Adding transitions
The Library provides a wide range of preset transitions from crossfades to explosions that you can add to your project.

Note: By default, you need to manually add transitions to your project. But when two clips overlap each other on the timeline, a default transition effect is added between the overlapping clips. If you want VideoStudio to automatically add transitions between clips, select File: Preferences – Edit then select Automatically add transition effect and choose a transition effect from the Default transition effect drop-down menu. This saves you time in adding transitions, especially when you are creating a slideshow project that contains images only, since transitions are applied and automatically added between images based on the transition effect you specified as the default transition.
To add a transition:
1 Click the Effect Step, then select one of the categories of transitions from the Folders list.
2 Scroll through the effects thumbnails in the Library. Select and drag an effect to the Timeline, roughly between two video clips. Drop your effect and it will snap into place. You can only drag and drop one clip at a time.
Tip: Double-clicking a transition in the Library automatically inserts it into the first empty transition slot between two clips. Repeating this process will insert a transition into the next empty transition slot.
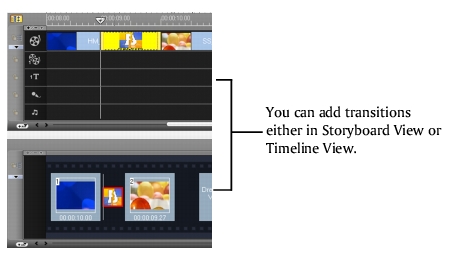
To replace a transition in your project, drag the new transition from the Library onto the transition thumbnail to be replaced on the Storyboard or Timeline.
The Album transition
One of the transitions you will find in the Library is the Album transition. Album simulates the turning pages similar to that of flipping photo album pages. You can choose from a variety of album layouts, change the album cover, background, size, and position, and more.
To apply the Album transition:
1 Click the Effect Step then select Album from the Library.
Apply by dragging a transition thumbnail in between two clips on the Video Track.
2 In the Options Panel, click Customize to open the Flip-Album dialog box.
3 In the Layout section, choose the desired look for the album.
4 In the Album tab, set the album’s Size, Position and Orientation.
To change the album cover, select a preset from Album cover templates, or select Custom album cover then import your own cover image.
5 Click the Background and Shadow tab.
To change the background of the album, select a preset from Background templates, or select Custom background then import your own background image.
To add a shadow, select Shadow. Set the shadow position by adjusting the X and Y-offset values. To make the shadow look softer, increase Soft edge.
Note: To change the shadow color, click the color box and choose the desired color.
6 Click the Page A tab. Customize the first page of the album.
To change the image on the page, select a preset from Album page templates, or select Custom album page then import your own image.
To adjust the size and position of the clip on the page, adjust the Size, X, and Y values.
7 Click the Page B tab. Customize the second page of the album.
Follow step 6 to make adjustments.
8 Use the slider and buttons below the Preview Window in the dialog box to preview the results.
9 Click OK to apply the adjustments.
The Flashback transition
You can use the Flashback transition to simulate a flashback or introduce a dream sequence for the next scene. Light is added to the dissolving scenes to create a dreamy effect.

The Flashback transition contains the following options:
- Fade level: Set the thickness of the soft edge of the mask.
- Halo brightness: Set the intensity of the light.
- Halo size: Set the coverage of the light.
- Contrast: Set the color contrast between the two clips.
- Middle flash: Adds an element of light to the dissolving mask.
- Inverse: Reverses the effect of the mask.
The Mask transitions
Different patterns or objects such as shapes, leaves, balls, and more can be used in transition effects by rendering them as masks. You can select from preset masks or import a BMP file and use it as a mask for your transition.
MaskA

MaskB

MaskC

MaskD

MaskE

MaskF
