Playing back your project
Project Playback is used to output your entire project or part of it to a DV camcorder. This also gives you an actual size preview of your movie using the entire screen of either a PC or TV monitor. You can only output your project on a DV camcorder if your project is using a DV AVI template. How your video is played back will depend on the Playback method option that you selected in Preferences.
To play back your project in actual size:
1 In the Options Panel, click Project Playback.
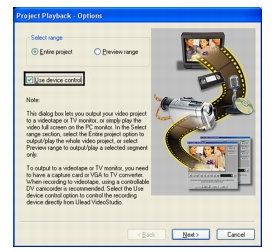
2 In the Project Playback – Options dialog box, click Finish. To stop the play back, press [Esc].
Note: If you only want to output the preview range of your project to the monitor, select Preview range.
To record your project to a DV camcorder:
1 Turn on your DV camcorder and set it to Play (VTR/VCR) mode.
2 In the Options Panel, click Project Playback.
3 In the Project Playback – Options dialog box, select Use device control then click Next.

Note: If you only want to output the preview range of your project to the DV camcorder, select Preview range.
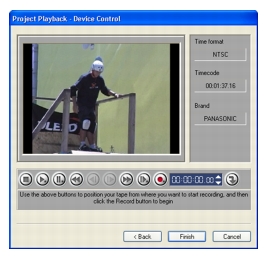
4 In the Project Playback – Device Control dialog box, use the Navigation Panel to go to the section of the DV tape where to start recording your project.

Tip: Click Transmit to device unit for preview to preview your project on the DV camcorder’s LCD monitor.
5 Click Record. When recording is complete, click Finish.